How to Clear Cache in Windows 10 Using Cmd
Guide to Flush DNS on Windows, Mac, Linux, Ubuntu, Google Chrome
Contents
- Guide to Flush DNS on Windows, Mac, Linux, Ubuntu, Google Chrome
- Flush DNS Cache on Microsoft Windows
- Windows 10
- Windows 8 / Windows 8.1
- Windows Vista / Windows 7
- Windows XP / 2000 / NT / 98
- Flush DNS Cache on Mac OS
- MacOS 10.15: Catalina
- MacOS 10.14: Mojave
- MacOS 10.13: High Sierra
- MacOS 10.12: Sierra
- Mac OS X 10.11: El Capitan
- Mac OS X 10.10: Yosemite
- Mac OS X 10.9: Mavericks
- Mac OS X 10.8: Mountain Lion
- Mac OS X 10.7: Lion
- Mac OS X 10.6: Snow Leopard and older versions
- Clear DNS Cache on Linux or Ubuntu
- Linux
- Ubuntu
- Bonus: Flush DNS on Google Chrome
Flush DNS is a command which helps to clear outdated or corrupted DNS resolver cache. It is commonly used along with IP release and renew commands to fix network connectivity related issues. As your computer automatically caches IPs and other DNS results to make subsequent requests to the same hostname faster, it might also cache some old or bad results. As a consequence, you might not be able to communicate with hosts properly. In fact, it is one of the best methods to solve INET_E_RESOURCE_NOT_FOUND error.
No matter what operating system (Windows, Linux, Mac, Ubuntu) or browser you use, you can manually speed up the process and clear DNS Cache using simple steps provided below. To make the navigation easier, use Table of Contents to jump to guide for your operating system version.
Related: How to Release & Renew IP Address on Windows, Mac, Linux?
The following instructions explain how to flush DNS on these operating systems:
- Windows 10, 8.1, 8, 7, Vista, 2000, NT, XP, 98;
- MacOS versions from 10.6 (Snow Leopard) to 10.15 (Catalina);
- Linux;
- Ubuntu;
- Chrome.

Flush DNS Cache on Microsoft Windows
Windows 10
Flush DNS on Windows 10 is a simple command that needs to be entered in Windows Command Processor, better known as Command Prompt (CMD). You must, however, open CMD with Administrator's privileges. Here's what you need to do.
- In Windows 10, use Windows search and type Command Prompt .
- Right-click Command Prompt and choose Run as Administrator.
- In User Account Control pop-up, click Yes.
- In CMD, type ipconfig /flushdns and press Enter.
Windows 8 / Windows 8.1
To flush DNS on Windows 8 or 8.1, ensure to use Command Prompt with Admin's privileges. Follow these steps to clear your DNS cache.
- In Windows 8/8.1, use Windows search and type Command Prompt .
- Right-click Command Prompt and choose Run as Administrator.
- In User Account Control pop-up, click Yes.
- In CMD, type ipconfig /flushdns and press Enter.
Windows Vista / Windows 7
In order to flush DNS cache on Windows 7, you need to open Command Prompt as Administrator. Here's how.
- Click on Start > All Programs > Accessories and find Command Prompt.
- Right-click Command Prompt and choose Run as Administrator.
- In CMD, type ipconfig /flushdns and press Enter.
Windows XP / 2000 / NT / 98
If you're looking on how to clear DNS cache on older Windows versions, look no further. All you need to do is:
- Click on Start > Run >
cmd.exe> OK. - Type ipconfig /flushdns and press Enter.
Flush DNS Cache on Mac OS
To clear DNS Cache on Mac OS X systems, follow the guidelines given below. Please pay attention to the commands shown for different Mac OS versions – not all of them are the same for every OS.
MacOS 10.15: Catalina
To flush DNS on MacOS Catalina, follow these steps.
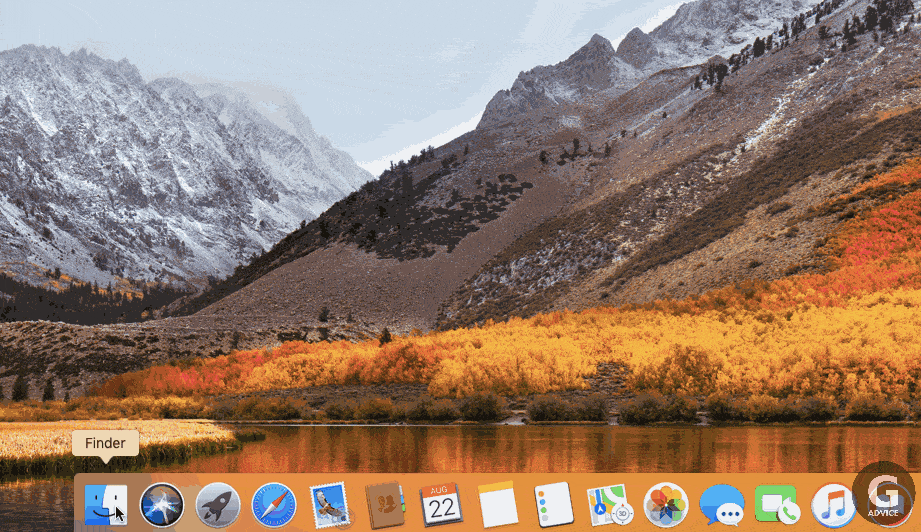
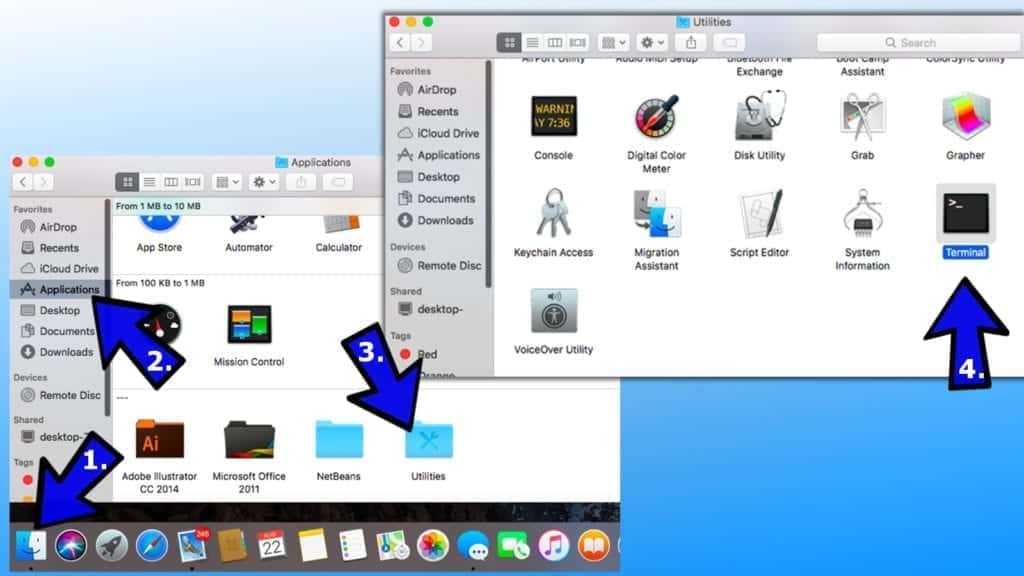
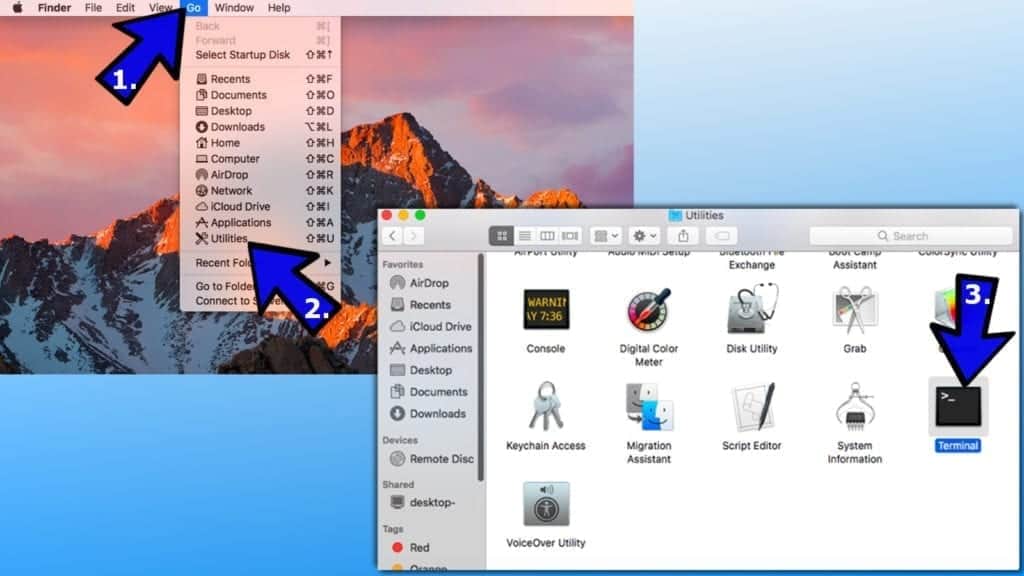
- Open Terminal (Application› Utilities›Terminal or click Go > Utilities > Terminal)
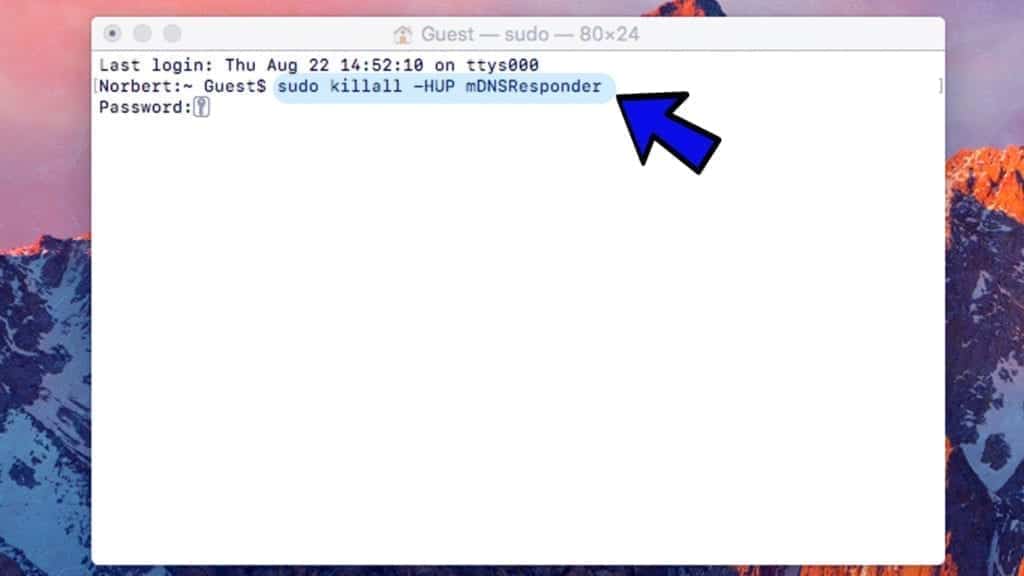
- Type sudo killall -HUP mDNSResponder and press Enter to run the command.
- Enter your password (it might not appear on the screen as you type).
- Press Enter. Close the Terminal.
MacOS 10.14: Mojave
Clearing DNS on MacOS Mojave is a quick and easy procedure if you follow these steps.
- Open Terminal (Application› Utilities›Terminal or click Go > Utilities > Terminal).
- Type sudo killall -HUP mDNSResponder and press Enter to run the command.
- Enter your password (it might not appear on the screen as you type).
- Press Enter. Close the Terminal.
MacOS 10.13: High Sierra
Flushing DNS on MacOS High Sierra can be done by following these guidelines.
- Open Terminal (Application› Utilities›Terminal or click Go > Utilities > Terminal).
- Type sudo killall -HUP mDNSResponder and press Enter to run the command.
- Enter your password (it might not appear on the screen as you type).
- Press Enter. Close the Terminal.
MacOS 10.12: Sierra
If you want to flush DNS on MacOS Sierra, follow these directions.
- Open Terminal (Application› Utilities›Terminal or click Go > Utilities > Terminal).
- Type sudo killall -HUP mDNSResponder and press Enter to run the command.
- Enter your password (it might not appear on the screen as you type).
- Press Enter. Close the Terminal.
Mac OS X 10.11: El Capitan
To flush DNS on MacOS X El Capitan, follow these steps.
- Open Terminal (Application› Utilities›Terminal or click Go > Utilities > Terminal).
- Type sudo killall -HUP mDNSResponder and press Enter to run the command.
- Enter your password (it might not appear on the screen as you type).
- Press Enter. Close the Terminal.
Mac OS X 10.10: Yosemite
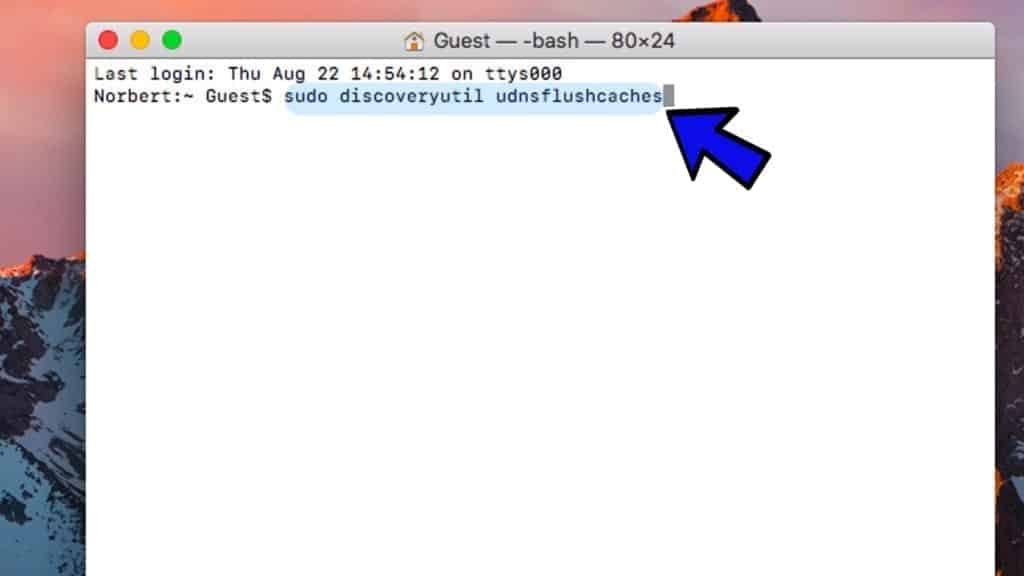
In order to flush DNS on MacOS X Yosemite, carry out these steps.
- Open Terminal (Application› Utilities›Terminal or click Go > Utilities > Terminal).
- Type sudo discoveryutil udnsflushcaches and press Enter to run the command.
- Enter your password (it might not appear on the screen as you type).
- Press Enter. Close the Terminal.
Mac OS X 10.9: Mavericks
To flush DNS on MacOS X Mavericks, follow these steps.
- Open Terminal (Application› Utilities›Terminal or click Go > Utilities > Terminal).
- Type sudo killall -HUP mDNSResponder and press Enter to run the command.
- Enter your password (it might not appear on the screen as you type).
- Press Enter. Close the Terminal.
Mac OS X 10.8: Mountain Lion
To clear DNS cache on MacOS X Mountain Lion, complete given instructions.
- Open Terminal (Application› Utilities›Terminal or click Go > Utilities > Terminal).
- Type sudo killall -HUP mDNSResponder and press Enter to run the command.
- Enter your password (it might not appear on the screen as you type).
- Press Enter. Close the Terminal.
Mac OS X 10.7: Lion
To flush DNS on MacOS X Lion, follow these steps.
- Open Terminal (Application› Utilities›Terminal or click Go > Utilities > Terminal).
- Type sudo killall -HUP mDNSResponder and press Enter to run the command.
- Enter your password (it might not appear on the screen as you type).
- Press Enter. Close the Terminal.
Mac OS X 10.6: Snow Leopard and older versions
To flush DNS on MacOS X Lion, follow these steps.
- Open Terminal (Application› Utilities›Terminal or click Go > Utilities > Terminal).
- Type sudo lookupd -flushcache and press Enter to run the command.
- Enter your password (it might not appear on the screen as you type).
- Press Enter. Close the Terminal.
Clear DNS Cache on Linux or Ubuntu
Linux
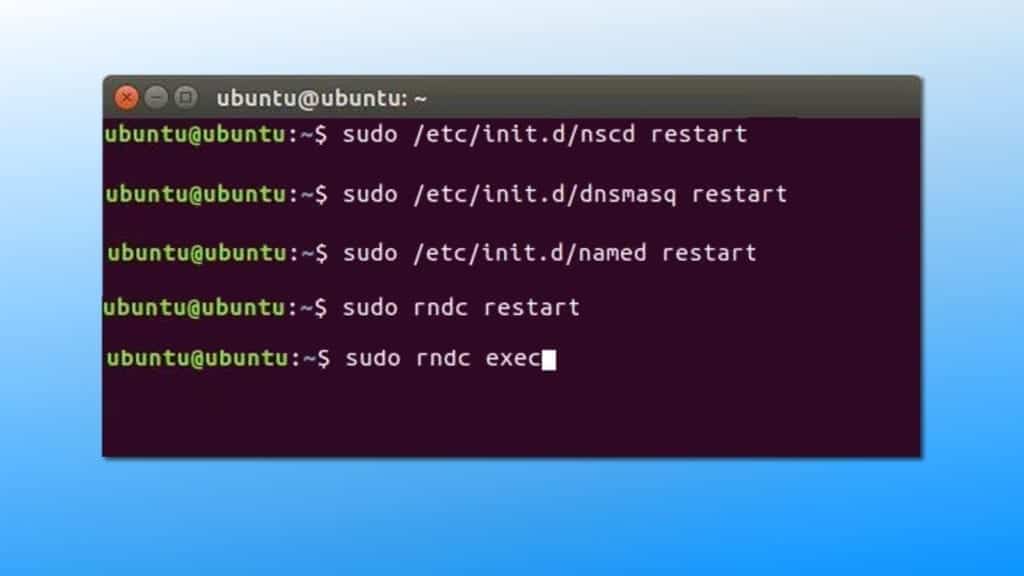
- Launch Terminal by pressing Ctrl + Alt + T.
- Linux offers various commands for DNS flushing. Here are they:
- To clear nscd DNS cache: sudo /etc/init.d/nscd restart ;
- To clear dnsmasq DNS cache: sudo /etc/init.d/dnsmasq restart ;
- To clear BIND DNS cache, use one of the given commands:
- sudo /etc/init.d/named restart ;
- sudo rndc restart ;
- sudo rndc exec .
Ubuntu
- Launch Terminal by pressing Ctrl + Alt + T.
- Type the following command: sudo /etc/init.d/dns-clean restart and press Enter.
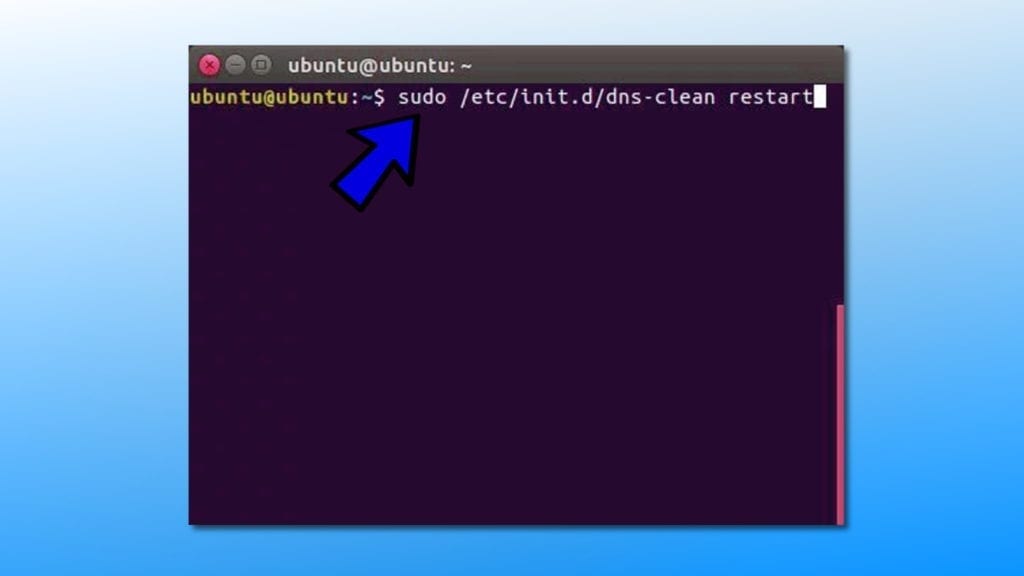
- Now, type sudo /etc/init.d/networking force-reloadand press Enter.

Bonus: Flush DNS on Google Chrome
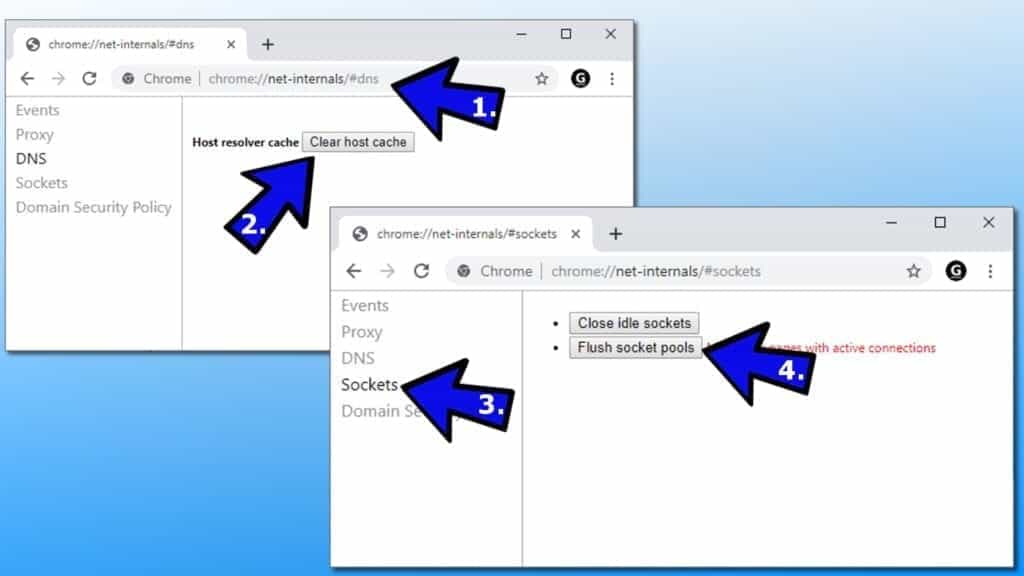
Google Chrome browser has an in-built caching system. In order to clear DNS cache from Chrome, complete these steps.
- Open Chrome browser. Copy and paste the following line into the Chrome address bar, then pressEnter.
chrome://net-internals/#dns
- ClickClear host cache.
- Now click on Sockets.
- Click Flush socket pools.
If you want to clear DNS cache on browsers like Firefox or Safari, we suggest resetting them.
That's it! We hope that our guide on how to flush DNS on Windows, Mac, Linux, Ubuntu or Chrome helped you to solve the problem.
This post was originally published on August 22, 2019 and updated on January 5, 202 1.

Matt Corey is passionate about the latest tech news, gadgets and everything IT. Matt loves to criticize Windows and help people solve problems related to this operating system. When he's not tinkering around with new gadgets he orders, he enjoys skydiving, as it is his favorite way to clear his mind and relax.
How to Clear Cache in Windows 10 Using Cmd
Source: https://geeksadvice.com/flush-dns/